

How To Setup Tftp Server On Windows
TFTP stands for "Trivial File Transfer Protocol" is a simple and lightweight protocol for transferring files over the network.
TFTP runs on UDP port 69 and does not use any security during the file transfer, thus its actually only skilful for transferring files within your LAN. It is commonly used in the place where security is not important and information technology has limited features compared to other file transfer protocols (FTP/FTPS/SCP).
More often than not, TFTP is used to boot operating systems over the network. CISCO devices besides employ the TFTP protocol to store configuration files and images and move them to and from switches, routers and firewalls.
Information technology is very useful for electronics circuit boards and microprocessors to download firmware into the chipset and its likewise used for transferring boot files and updating NVRAM. It does not provide authentication and no command structure like FTP, SFTP and SCP.
TFTP cannot listing directory and there is no mistake recovery like TCP and nor does it let you to delete or rename files.
TFTP is used for its simplicity equally it is specifically designed to read and write files without establishing a connection between the customer and the server.
It is very useful for thin clients, terminals and disk-less workstations with no room to install their own operating systems.
TFTP protocol also allows the network clients to automatically obtain the IP address of the TFTP server thus making TFTP not merely like shooting fish in a barrel to implement simply also provide a ameliorate manner for file transfers.
However, sending or receiving sensitive files via the TFTP without authentication or encryption is very risky.
In this tutorial, nosotros'll learn how to setup a TFTP server and a TFTP Customer on Windows a system and too learn how to configure your Firewall to allow file transfer between the TFTP server and the TFTP customer.
Install TFTP Server Windows
Get-go, you will need to download the SolarWinds TFTP server from their download page:
https://www.solarwinds.com/free-tools/free-tftp-server/

Once downloaded, extract the downloaded file and double click on the installer to start the installation, you lot should meet the following screen:
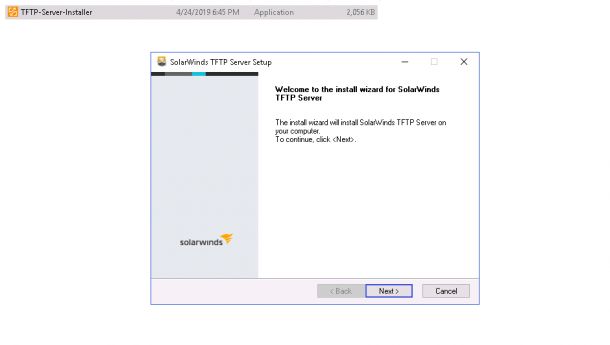
Click on the Next button.
You will be redirected to the License understanding page as shown below:
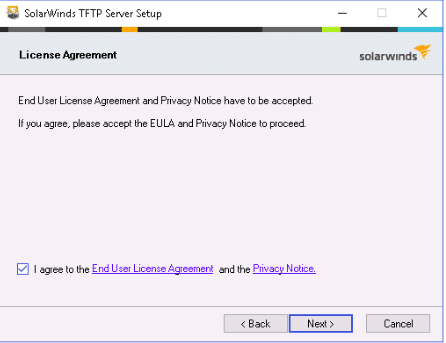
Accept the License agreement and click on the Next push.
You will be asked to provide the location of the TFTP server as shown below:
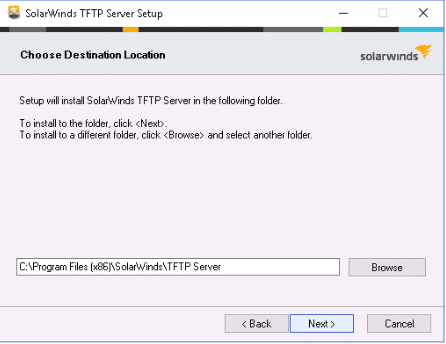
Click on the Next push button to keep with the default location.
You should see the post-obit folio:
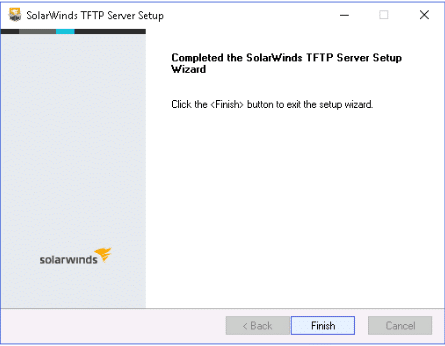
Click on the Finish button to complete the installation.
After installing the TFTP server, you lot will need to configure it.
You can follow the below steps to configure the TFTP server:
Configure TFTP Server
1. Open up the TFTP Server from the Get-go Menu as shown below:
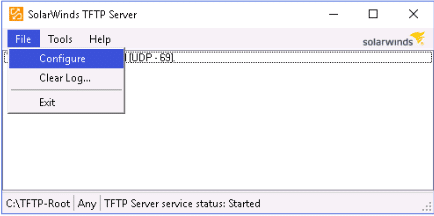
2. Click on the File => Configure push as seen in the above Screenshot.
Y'all should run across the following screen:
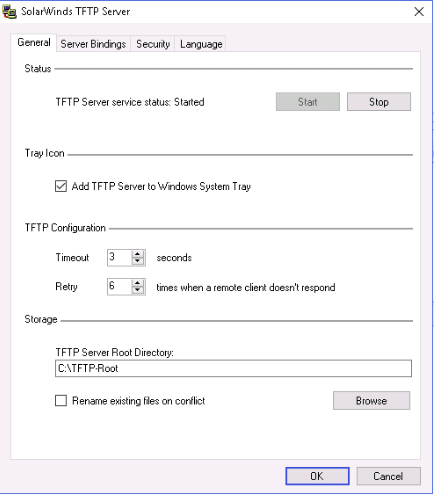
iii. Every bit seen in the screenshot above, Select the TFTP Server Root Directory field and provide the TFTP root directory, then click on the Security tab.
You should see the following screen:
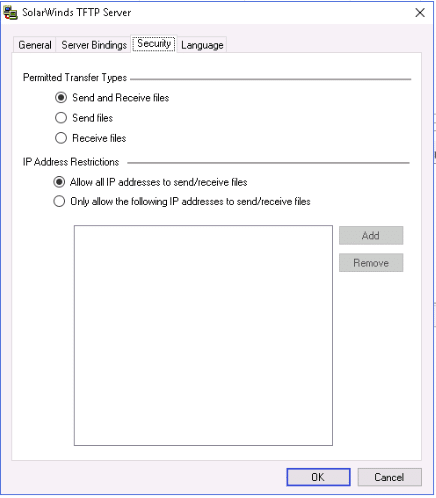
4. In the Permitted Transfer Types department, check the box " Send and Receive files " and " Allow All IP address to ship/receive Files " and click on the OK button to terminate the configuration.
Once y'all are finished, you can go along to the side by side pace.
Install TFTP Client
At this point, the TFTP server is installed and configured.
Now, you will need to install a TFTP Client on the Customer calculator.
You can install the TFTP Client on the customer figurer by following the below steps:
one. Click on the Starting time Carte and click on Control Panel.
2. Click on the Programs and Features => Turn Windows features on or off. This will open the Windows Features dialog box.
3. Roll down until y'all see the TFTP Client bank check box and CHECK it as shown beneath:
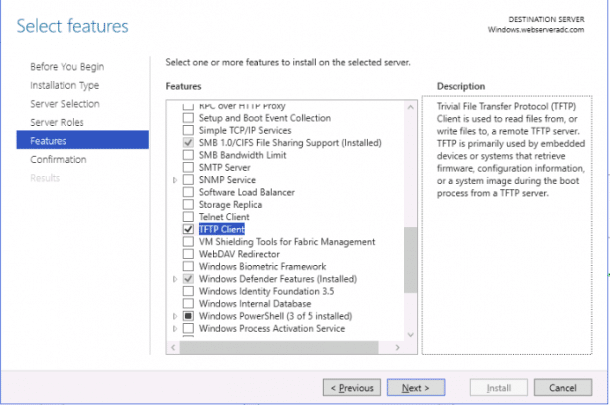
4. Click on the OK push to start the installation process of the TFTP client.
This process will take some time to finish the installation. Once you lot are finished, you tin can proceed to the next step.
Configuring Firewall to Allow TFTP
Before using the TFTP client, y'all volition demand to plough off the Windows Firewall or configure the Firewall to permit the inbound/outbound transfer of files using the TFTP client.
You can follow the beneath steps to add an exception for the TFTP connections:
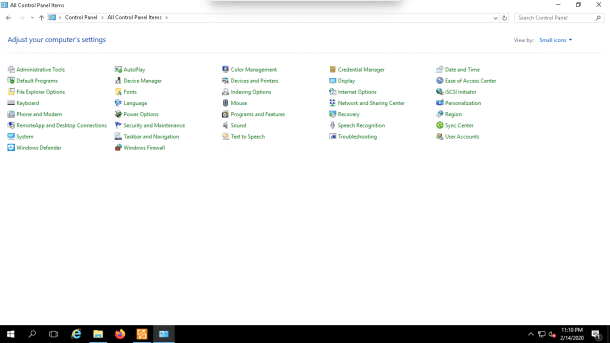
1. Get to the Start Carte du jour and open up the Control Panel as shown below:
ii. Click on the Windows Firewall to open up the firewall as shown below:
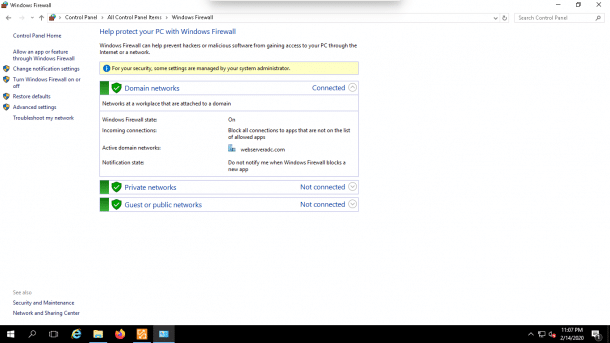
3. In the left-pane, click on the "Allow an app or characteristic through Windows Firewall".
You should meet the following page:
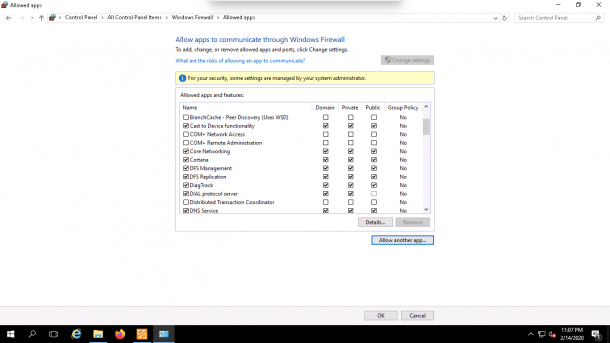
4. Click on theAllow an app or feature through Windows Firewall at the lesser. You should see the following page:
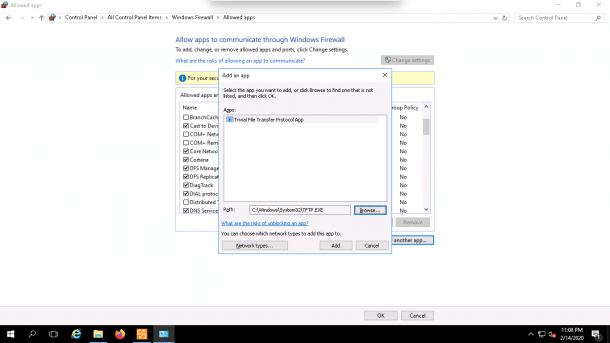
5. Click on the Browse push and specify the TFTP.EXE path and click on the Add button.
You should see the following page:
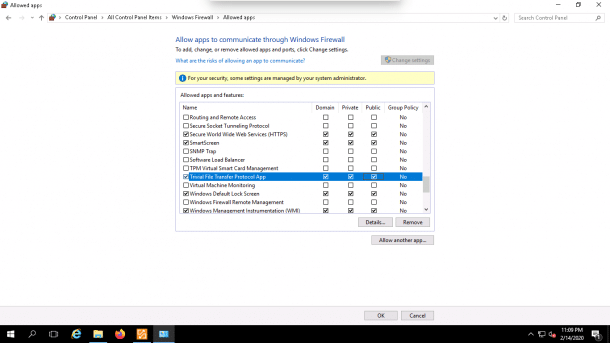
6. You lot should see that the Trivial File Transfer Protocol App should exist highlighted.
7. Now, click on the OK button to finish the process.
At this point, your client computer is configured to allow PUT and Go command against your TFTP server.
Transfer File with TFTP Client
You are now ready to transfer file using the TFTP customer.
Go to the TFTP client computer, open the command line interface and run the following command:
tftp
You should see all the options available with tftp command in the following page:
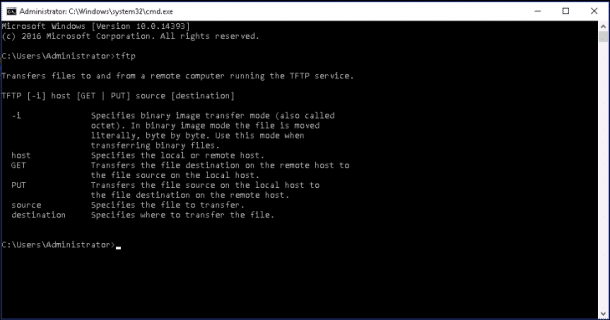
If yous want to send a file to the TFTP server, use the following syntax:
tftp your-tftpserver-ip put location-of-the-file
For case, to send the file named testfile.txt located in Documents directory to the TFTP server run the following command:
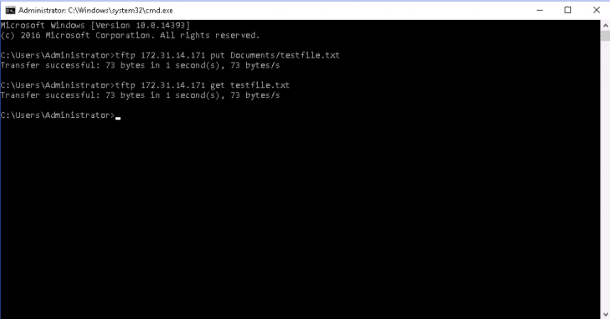
tftp 172.31.fourteen.171 put Documents/testfile.txt
Once the file transfers successfully, you should run into the post-obit output:
Transfer successful: 73 bytes in 1 second(s), 73 bytes/s
If you want to transfer file from the TFTP server to your local reckoner, employ the following syntax:
tftp your-tftpserver-ip get location-of-the-file
For example, transfer the file named testfile.txt from the TFTP server to your local calculator run the post-obit control:
tftp 172.31.xiv.171 become testfile.txt
Once the file transfers successfully, you should encounter the following output:
Transfer successful: 73 bytes in 1 2d(s), 73 bytes/s
Example Screen:
You tin also transfer the files over the internet using the Public IP address of the TFTP server – Delight remember, there is not encryption or any security when sending over the Internet!
Conclusion
In the above guide, we've learned how to install and configure the TFTP server and Customer on Windows arrangement.
You can at present hands transfer files to and from your TFTP server for Free.
Delight Feel costless to inquire the states any questions beneath in the comments, we'll try to answer them immediately!
Source: https://www.webservertalk.com/setup-configure-tftp-on-windows-10/
Posted by: brittainseatomint.blogspot.com
0 Response to "How To Setup Tftp Server On Windows"
Post a Comment